
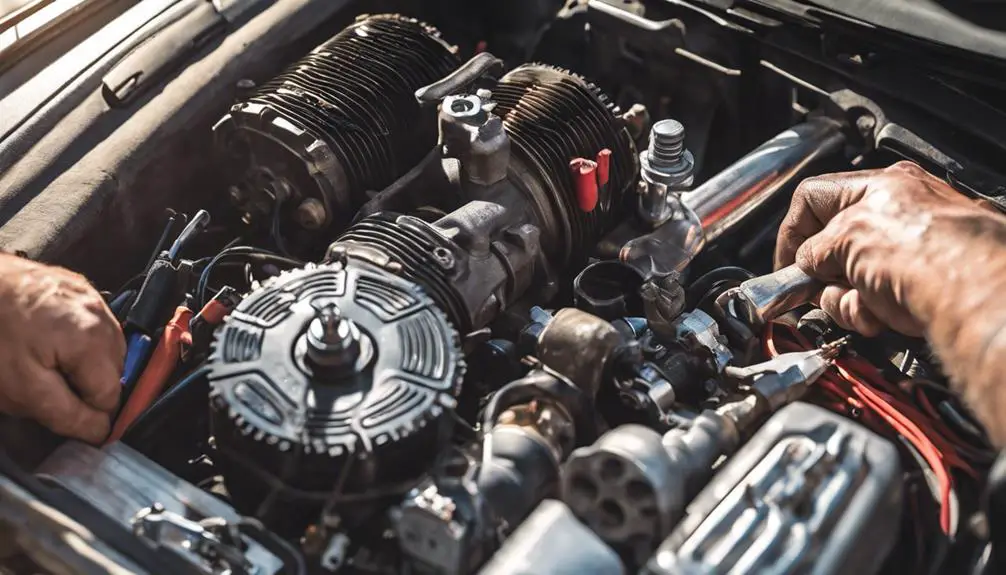
Sorry for the confusion, but it seems like there was a misunderstanding. Let's break down how to replace a car AC compressor in simple steps:
1. Safety First: Start by disconnecting the car battery to avoid any electrical issues.
2. Release Refrigerant: Use special recovery gear to safely let out any refrigerant from the AC system.
3. Remove Old Parts: Take off the serpentine belt and unplug any wires connected to the compressor.
Then, take out the old compressor by removing the bolts.
4. Put in the New Compressor: Place the new compressor in the right spot.
Tighten it with the bolts, but don't overdo it. Connect the wires again and make sure the belt is lined up properly.
5. Evacuate and Recharge: Use a vacuum pump to suck out air from the system.
Then, refill it with the right amount of refrigerant.
6. Check Everything: Turn on the car and test the AC to see if it's working well.
Look for any leaks or issues.
By following these steps, you can replace a car's AC compressor. Take your time, and make sure to do each step carefully.
What tools are needed to replace a car AC compressor?
To change a car's AC compressor, you'll need a few tools.
Get a ratchet and socket set to loosen and tighten bolts. Have a wrench set ready for dealing with different fasteners. Use a torque wrench to make sure bolts are just right, not too tight or too loose.
An AC manifold gauge set helps check the system's pressure before and after. Refrigerant recovery equipment is for safely removing old refrigerant.
Wear safety goggles and gloves to guard against refrigerant contact. A serpentine belt tool might be necessary to take off and put back the belt.
What are the steps involved in replacing a car AC compressor?
Before starting to replace a car's AC compressor, make sure the car is parked on flat ground and the engine is cool. First, disconnect the battery to avoid any electrical issues. Next, take off the serpentine belt. Then, carefully remove the refrigerant lines attached to the compressor. After that, unbolt the compressor from its bracket and take it out of the car. To install the new compressor, follow these steps in reverse order, ensuring all parts fit and are secure. Finally, reconnect the battery and put the serpentine belt back on.
| Step | Task | Tips |
|---|---|---|
| 1 | Disconnect the battery | Safety first |
| 2 | Remove the serpentine belt | Use the right tools |
| 3 | Take off refrigerant lines | Watch for leftover fluid |
| 4 | Unbolt and remove compressor | Handle with care |
| 5 | Install new compressor | Reverse removal steps |
How do you safely discharge the refrigerant from the car AC system?
To safely remove refrigerant from a car's AC, you should use the right tools and follow safe steps.
First, get a recovery machine and attach it to the car's AC service ports. Make sure the connection is tight to avoid leaks.
Turn on the machine to collect the refrigerant. This process requires special skills and a certification, as doing it wrong can be harmful and illegal.
It's best to ask an expert with the right knowledge and tools to do this for you. This ensures the task is done safely and legally.
How do you identify a faulty car AC compressor?
To check if a car's AC compressor is faulty, follow these steps:
- Listen for Noises: Turn on the AC and listen for any odd sounds like grinding or squealing. These can mean there's something wrong inside the compressor or with its bearings.
- Look for Oil Leaks: Check the compressor for any oil spots. Oil leaks might mean there's a problem with a seal.
- Check Air Temperature: If the AC isn't blowing cold air, the compressor might not be working right.
- Test Electrical Parts: Use a multimeter to check the electrical circuits and the clutch coil. Make sure the readings match what the car manufacturer says they should be.
What precautions should be taken when replacing a car AC compressor?
When you're changing your car's AC compressor, follow these steps to stay safe and do it right:
- Disconnect the Battery: Before you start, take out the car's battery to avoid any electric shocks.
- Evacuate the AC System: Make sure to remove all refrigerant from the AC system. This will prevent harmful exposure to chemicals.
- Wear Safety Gear: Use goggles and gloves to protect your eyes and hands while working.
- Ventilation: Keep the area well-aired to avoid breathing in any harmful substances.
- Cool Engine: Wait until the engine is cool to avoid getting burned.
- Handle with Care: Be gentle with all parts to prevent leaks or breaks.
- Check Compatibility: Make sure new parts like O-rings and seals match your car model to avoid problems.
Following these steps will help you replace the compressor safely and effectively.
How long does it typically take to replace a car AC compressor?
Replacing a car AC compressor usually takes between 2 to 5 hours. The time needed depends on the car's make and model, along with how skilled the mechanic is.
- Car Design: Cars with complicated engine layouts might take longer because they need more time for taking apart and putting back together.
- Mechanic's Skill: A mechanic who knows the car model well can often finish the job faster.
- Part Availability: Having the needed parts right away makes the process smoother. If parts are hard to find, it can take more time.
- Checking and Testing: Checking the system before and after the compressor is installed can add to the time, but it's needed for good performance.
How do you know if the new AC compressor is compatible with your car model?
To make sure a new AC compressor fits your car, follow these steps:
- Check your car's manual or specs from the manufacturer. Look for the part number for the compressor that works with your car.
- When buying a new compressor, make sure it matches this part number.
- Look at the compressor's details like voltage, pulley type, and how it mounts. These need to fit with your car's setup.
- Compare the numbers with the original equipment manufacturer's (OEM) to be sure they match.
- Talk to a trusted car parts supplier or a mechanic. They can give you good advice.
Following these steps helps the compressor work well with your car.
What are the potential risks of replacing a car AC compressor yourself?
Replacing your car's AC compressor by yourself can be risky. Here are some potential issues you might face:
- Installation Mistakes: If the parts don't line up right or are not fitted properly, the AC might not work well and could wear out fast.
- Refrigerant Problems: Handling refrigerants without care can harm the environment and affect your health.
- Damage to Other Parts: While working, you might accidentally harm other parts like hoses or belts.
- Loss of Warranty: Fixing it yourself may cancel any warranty you have, which could mean more costs if you need a professional later.
Think carefully before deciding to do this repair on your own.
How do you properly refill and recharge the car AC system after compressor replacement?
When replacing your car's AC compressor, correctly refilling and recharging the AC system is key. First, make sure there are no leaks. You can use a UV dye or an electronic detector for this. Next, remove any air and moisture with a vacuum pump. This helps the AC work better.
Now, find out which refrigerant your car needs. Check the vehicle's manual for this information. Once you know the correct refrigerant type, use a manifold gauge set to fill the system. Make sure you add the right amount as stated in the manual. This will help keep the cooling system working well and prevent any damage to the compressor.
| Step | What to Do |
|---|---|
| Find Leaks | Use UV dye or a leak detector |
| Remove Air | Use a vacuum pump |
| Pick Refrigerant | Check the car manual for the right type |
| Fill System | Use gauges to add the correct amount of refrigerant |
What are the signs that a car AC compressor replacement was successful?
After replacing a car's AC compressor, there are a few things to check to make sure everything is working well.
- Cool Air: Turn on the air conditioning and see if it blows cool air steadily.
- Quiet Operation: Listen for any strange sounds like grinding or squealing. The compressor should run quietly.
- No Leaks: Look around the compressor for any signs of leaking refrigerant.
- Steady Pressure: A professional can use tools to check if the pressure levels are steady.
These steps can help confirm that the new compressor is working properly.
Wrapping Up
Changing a car's AC compressor needs careful attention and following safety steps. You'll need the right tools and an easy-to-follow plan to do it right. First, check if the compressor is broken and make sure the new one fits your car. Let the old refrigerant out safely, and then refill the system correctly. Be aware of any risks and look for signs that everything is working well after you're done. This will help keep your car's AC running smoothly.