
Changing the orifice tube in your car's AC system helps keep it cool and prevents compressor problems. Signs that the tube might need replacing include the AC cooling unevenly, hearing strange noises from the compressor, or noticing refrigerant leaks.
To change the orifice tube, you'll need wrenches, screwdrivers, and some safety gear. First, find the tube near the firewall. Take out the old tube carefully and check it for any dirt or debris.
Then, put in the new tube and test the AC system to make sure everything is working right. This job can cost between $100 and $250, which covers both parts and labor.
It's important to install the new tube properly and check for any problems afterward to avoid clogs or leaks. Follow simple steps for an easy replacement process.
What are the symptoms of a faulty orifice tube in a car AC system?
If your car's air conditioning isn't working well, the orifice tube might be the issue. This tiny part helps control the refrigerant flow.
When it fails, you may notice these signs:
- The AC blows warm or uneven air instead of cool air.
- The compressor turns on and off more often than usual, making strange noises.
- Frost could build up on the evaporator or AC lines.
- You might see refrigerant leaks.
These problems mean the orifice tube could be blocked or broken, affecting how the AC works.
It's a good idea to check and possibly replace it.
How do you locate the orifice tube in a car's AC system?
To find the orifice tube in your car's AC system, follow these steps:
- Check the Car Manual: Look at the manual for your car's make and model. The location can differ between vehicles.
- Follow the Liquid Line: This line goes from the condenser to the evaporator. Look for a spot where the line is thicker or has a crimp.
- Look Near the Firewall: Many cars have the orifice tube near the firewall, often inside the engine compartment.
- Spot the Connectors: Search for fittings or joints along the line that might indicate where the tube is.
What tools are needed to replace an orifice tube in a car AC?
To replace an orifice tube in a car's AC system, you'll need a few key tools.
Begin with wrenches to disconnect the refrigerant lines. Use a screwdriver to take off any panels blocking your way. An orifice tube removal tool helps pull out the tube without causing damage.
Wear safety goggles and gloves to stay safe from refrigerant exposure. A manifold gauge set is used to both recover and recharge the refrigerant, keeping the system pressure correct.
A vacuum pump is necessary to clear out moisture. Have a new orifice tube and O-rings ready to complete the job.
What are the steps involved in replacing a car AC orifice tube?
Here's how to change a car AC orifice tube in a clear and simple way:
- Let Out the Refrigerant: Use a recovery machine to safely let out the refrigerant from the AC system. This keeps you safe and protects the environment.
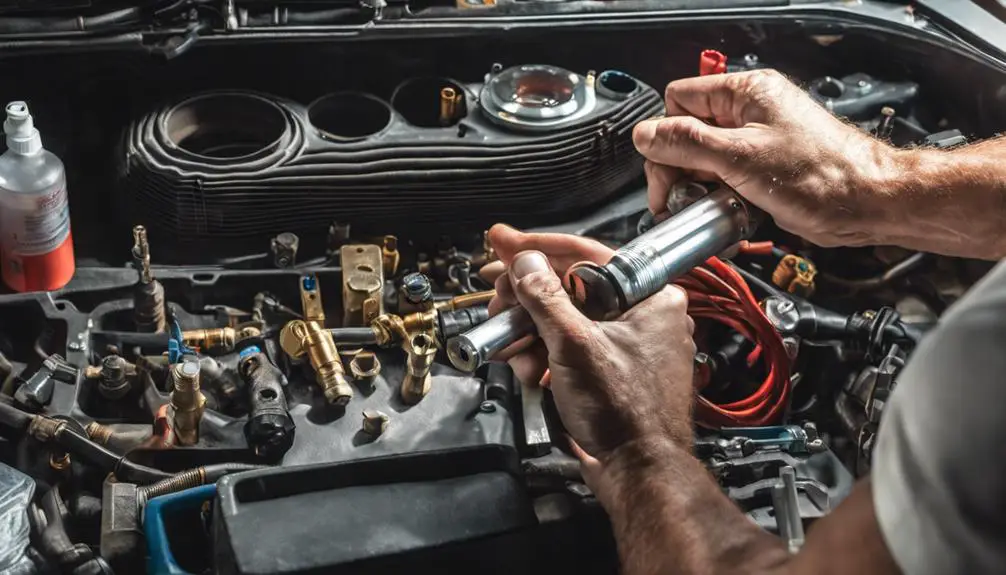
- Find and Take Out the Orifice Tube: Look for the orifice tube in the liquid line. Use needle-nose pliers to gently pull it out.
- Check and Clean: Look over the orifice tube for any dirt or damage. Clean the area around it so no dirt gets into the system when you put in the new one.
- Put in the New Tube and Fill Up: Place the new orifice tube in securely. Then, fill the AC system back up with refrigerant.
How can you tell if replacing the orifice tube fixed the AC issue?
Once you've put in the new orifice tube and refilled the AC with refrigerant, check if it works right.
First, turn the car's AC to the coldest setting. Feel the air from the vents. It should be cold and consistent, not warm or changing.
Listen to the compressor. It should sound regular without any odd noises or frequent stopping and starting.
Use a leak detector tool to see if there are any refrigerant leaks. Make sure there's no drop in system pressure.
Finally, use AC gauges to check the pressure on both the high and low sides. The readings should match what the car maker says they should be.
If everything checks out, the orifice tube replacement is likely successful.
What precautions should be taken when replacing an orifice tube in a car AC?
When you change the orifice tube in a car's AC system, follow these steps:
- Release Pressure: First, let out the AC system's pressure. This stops refrigerant from escaping suddenly.
- Gather Tools: Use the right tools so you don't damage parts and everything fits correctly.
- Wear Safety Gear: Put on safety goggles and gloves. This keeps you safe from refrigerant and sharp parts.
- Check and Clean: Look for dirt or debris in the AC system.
Clean around the orifice tube to avoid clogs or issues.
What are common issues that might occur after replacing an orifice tube?
When you change an orifice tube, you might face some problems afterward. One issue is a blockage. This can happen if dirt or other stuff is still in the AC system, stopping the refrigerant from flowing right.
Another problem could be leaks. These might occur if the connections aren't tight or if something got damaged during the installation.
If the orifice tube is put in wrong, it can mess with the temperature, causing poor cooling or the evaporator might freeze.
Also, not changing other parts like the accumulator or receiver-drier could make the system work less efficiently.
How often should the orifice tube in a car AC be replaced?
The orifice tube in a car's air conditioner might need changing for a few reasons:
- Older Cars or Heavy Use: If your car is older or you drive in tough conditions a lot, check the orifice tube more often.
- Cooling Problems: If the AC isn't cooling well or you hear strange sounds, it might be time to look at the orifice tube.
- Regular Checks: Following the car's maintenance plan can help spot problems early, which may keep the orifice tube working longer.
- Dirt or Moisture: If dirt or moisture has gotten into the AC, check and maybe replace the orifice tube right away to stop more problems.
Can a clogged orifice tube impact the efficiency of a car's AC system?
A clogged orifice tube can mess up your car's air conditioning system. This little tube helps control how the refrigerant moves from one side of the system to the other.
If it gets blocked, the cooling won't work right. You might notice the air isn't as cold, or it's not even cooling at all.
When the tube is clogged, the pressure inside the system goes up. This can be hard on the compressor and other parts.
The refrigerant might even leak or damage the compressor. It's a good idea to check and clean the orifice tube now and then to keep everything running smoothly.
What is the cost range for professional orifice tube replacement in a car AC?
Replacing the orifice tube in a car's AC usually costs between $100 and $250. The price can change based on the car type, where you live, and the shop's labor rates.
Here's a breakdown of the costs:
- Orifice Tube: The part itself is cheap, costing about $5 to $30.
- Labor: Getting the work done can be $70 to $150, depending on how hard it is to reach the tube.
- Diagnostics: Some places might charge $50 to $100 to figure out what's wrong with the AC.
- Extra Fixes: If other parts need fixing, the cost can go up.
Knowing these costs can help you prepare for the repair.
Wrapping Up
Changing the AC orifice tube in a car is an important job. This little part can cause problems like the AC not cooling well or making strange noises. To fix it, you need to know where it is and have the right tools. After you change it, check to see if the AC works better. Doing this regularly can help keep your AC running smoothly. Hiring a professional can cost differently, so it's good to know how it's done and what to look out for after replacing it to keep your AC in top shape.