
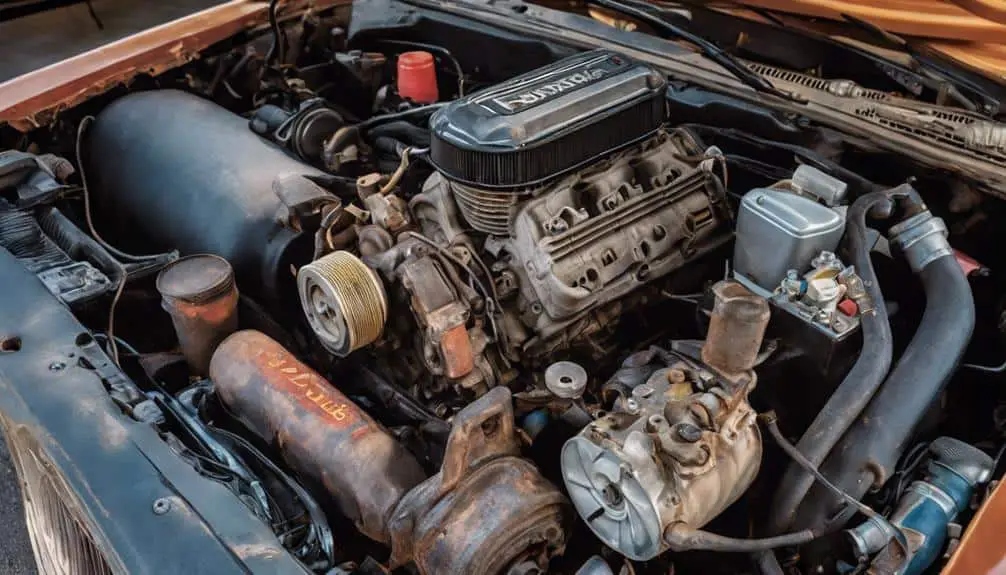
A well-maintained alternator is crucial to extending the life of your car, as a faulty alternator can lead to costly repairs, breakdowns, and even engine damage, making DIY repair knowledge essential for car owners looking to save money and avoid potential pitfalls. To diagnose alternator failure, look for signs such as dimming dashboard lights, whining or grinding noises, and malfunctioning car accessories. When repairing, ensure you have the necessary tools, disconnect the battery safely, and identify wiring and belt issues.
Alternator Failure Signs
Recognizing alternator failure signs is crucial to avoid being stranded.
A faulty alternator often exhibits subtle symptoms before complete failure.
These signs may include:
- A slow or dimming dashboard light, indicating a weak electrical system
- A whining or grinding noise from the alternator
- Dim or flickering headlights
- A dead battery that won’t hold a charge
- Malfunctioning car accessories, such as the radio or air conditioning
If you notice any of these signs, it’s essential to address the issue promptly to avoid further damage to your vehicle’s electrical system.
Ignoring these signs can lead to more severe and costly problems down the road.
Gathering Essential Repair Tools
To ensure a smooth and efficient alternator repair, having the right tools is crucial.
The absence of essential tools can lead to time wastage, frustration, and potential damage to the vehicle’s electrical system.
The following tools are must-haves for a successful alternator repair:
- Socket set: A socket set with various sizes is necessary for removing the alternator’s mounting bolts and other components.
- Torx screwdriver: A Torx screwdriver is required for removing the alternator’s electrical connections.
- Wire brush: A wire brush helps to clean corrosion from the battery terminals and cables.
- Multimeter: A multimeter is essential for diagnosing issues with the alternator’s electrical output.
These tools will help you navigate the repair process with confidence and ensure a reliable fix.
Disconnecting the Battery Safely
When repairing an alternator, it is essential to disconnect the battery to prevent accidental short circuits or electrical shocks.
This precaution ensures your safety and the safety of your vehicle.
To disconnect the battery safely:
Locate the battery and identify the negative (black) cable.
Loosen the nut on the negative cable clamp with a wrench, then slide the clamp off the battery post.
Tuck the cable away from the battery post to prevent accidental contact.
Verify the battery is disconnected before proceeding with the repair.
Alternatively, you can follow these step-by-step instructions:
- Locate the battery and identify the negative (black) cable.
- Loosen the nut on the negative cable clamp with a wrench.
- Slide the clamp off the battery post.
- Tuck the cable away from the battery post to prevent accidental contact.
- Verify the battery is disconnected before proceeding with the repair.
Identifying Alternator Wiring Issues
Alternator wiring issues can significantly impede the repair process, leading to faulty electrical signals and impeding proper alternator function.
To identify these issues, a thorough inspection of the wiring harness and connections is crucial.
This involves:
- Inspecting wires and terminals for signs of wear, corrosion, or damage.
- Verifying that all connections are secure and not loose.
- Looking for signs of overheating, such as melted insulation or burn marks.
- Using a multimeter to test the voltage and resistance in the wiring circuit.
Replacing the Alternator Belt
Replacing the alternator belt is a crucial maintenance task to ensure the alternator functions efficiently and prolong its lifespan.
Inspect the alternator belt for signs of wear, such as cracks, frays, or excessive wear on the ribs.
A worn-out belt can cause the alternator to malfunction, leading to battery drain, dim headlights, and stalling.
Removal and Installation Steps
- Release Belt Tension: Locate the belt tensioner and rotate it counterclockwise to release the tension.
- Remove Old Belt: Take out the old belt and discard it.
- Install New Belt: Place the new belt on the pulleys, ensuring it is properly seated.
- Re-tension Belt: Rotate the tensioner clockwise until it reaches the recommended specification.
Important Considerations
Properly replacing the alternator belt is critical to prevent further issues.
Ensure the new belt is of the correct type and size, and that the tension is set according to the manufacturer’s specifications.
Inspecting the Alternator Pulley
The alternator pulley plays a vital role in ensuring the smooth operation of the alternator.
A faulty pulley can lead to premature wear on the alternator belt, resulting in costly repairs.
The following checks should be performed during inspection:
- Wear and tear: Cracks, grooves, or excessive wear on the pulley’s surface indicate wear and tear.
- Misalignment: Ensure the pulley is properly aligned with the alternator belt to prevent uneven wear.
- Corrosion: Inspect the pulley for signs of rust or corrosion, which can weaken its structure.
- Bearing condition: Check the pulley bearings for smooth rotation and any signs of wear or damage.
Additionally, it is essential to inspect the pulley’s surface for signs of scoring, overheating, or abnormal vibration, which can indicate a more serious underlying issue.
Cleaning the Alternator Terminals
Cleaning the alternator terminals is crucial for maintaining the overall health of the electrical system.
Corrosion and grime on the terminals can cause voltage drops, leading to poor engine performance and decreased battery life.
The consequences of neglecting this maintenance task can be far-reaching.
For instance, corrosion and wear on the alternator pulley can have a ripple effect on the entire electrical system, leading to issues that extend beyond the alternator itself.
To clean the terminals, follow these steps:
- Disconnect the battery to prevent any accidental short circuits.
- Remove any cables or wires connected to the alternator.
- Use a wire brush to remove corrosion and grime from the terminals.
- Wipe the terminals clean with a cloth to remove any remaining debris.
- Apply a thin layer of dielectric grease to the terminals to prevent future corrosion.
Properly cleaning the alternator terminals can help restore optimal electrical system function and prevent costly repairs down the road.
Additionally, using dielectric grease on the terminals can help protect against moisture and contaminants, further extending the life of the electrical system.
Replacing the Alternator Brushes
Alternator brushes are a critical component of the electrical system, responsible for transferring electrical current to the rotor, enabling power generation.
As they wear out over time, the alternator’s performance suffers.
To replace them:
- Disconnect the vehicle’s battery to prevent accidental starts or electrical shocks.
- Locate the brush holder and remove any screws or clips holding it in place.
- Remove the old brushes from their holder, taking note of their orientation and position.
- Install the new brushes, ensuring they are properly seated and secured in their holder.
Remember to handle the new brushes carefully to prevent damage, as they are sensitive to contamination and physical stress.
Testing the Alternator Output
To ensure the repair is successful, it’s crucial to verify the alternator’s output voltage meets the manufacturer’s specifications.
Measurement Procedure:
- Set the multimeter to DC volts.
- Connect the leads to the alternator’s output terminals.
- Take a reading.
Expected Results:
The voltage reading should fall between 13.5 and 14.5 volts, depending on the vehicle’s electrical system.
Consult the repair manual or the manufacturer’s website for specific specifications.
Interpretation:
If the voltage reading is within the specified range, the alternator is functioning properly.
However, if the voltage is outside this range, further diagnosis is required to identify the issue.
Reinstalling the Alternator Properly
Reinstalling the alternator requires attention to detail to ensure proper function and efficiency.
To begin, the mounting bracket must be securely tightened to prevent excessive movement or vibration of the alternator.
Next, reconnect the electrical connections by reattaching the wiring harness and battery cables.
Ensure they are securely fastened and not in contact with any moving parts.
The serpentine belt must be properly aligned and reattached, avoiding over- or under-tightening.
People Also Ask
Can I Replace the Alternator Myself if I’m Not Mechanically Inclined?
You can try replacing the alternator yourself, but it’s not recommended if you’re not mechanically inclined. Incorrect installation can cause electrical shock, damage to other parts, and costly repairs.
How Often Should I Inspect and Maintain My Car’s Alternator?
Inspect your car’s alternator belt every 5,000 to 7,000 miles and the alternator itself every 30,000 to 50,000 miles to prevent failure and ensure optimal performance.
Will a Faulty Alternator Damage My Car’s Electrical System?
A faulty alternator can damage your car’s electrical system, causing voltage problems, overheating, and wear on parts like batteries and computers if not fixed.
Can I Use a Remanufactured Alternator Instead of a New One?
Yes, you can use a remanufactured alternator instead of a new one. It’s a cost-effective and eco-friendly option that offers similar performance and reliability at a lower price with less waste.
Will a High-Performance Alternator Improve My Car’s Overall Performance?
Upgrading to a high-performance alternator can improve your car’s overall performance, especially when using high-power accessories like heavy audio systems. It helps your electrical system work more efficiently, providing the power you need when you need it.